For this tutorial, I used
GIMP which is a free editing program and it's a lot like Photoshop. :)
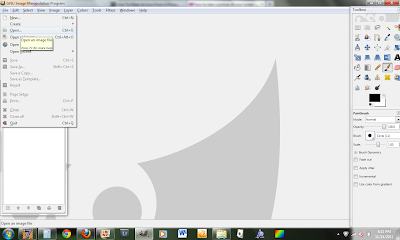
Step 1- Open GIMP, and open the picture you want to shrink (File>Open)
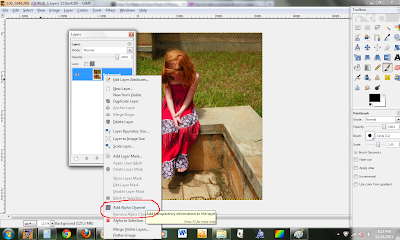
Step 2- After you find your picture, open layers (control L) then right click on your photo in the layers box. Once you've right clicked, click on the 'Add Alpha Channel.'
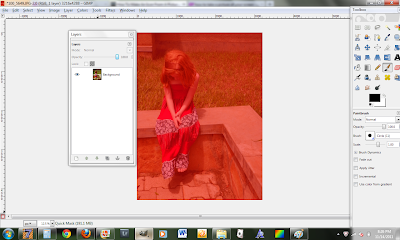
Step 3- Press Shift Q. Now your whole picture should turn red.
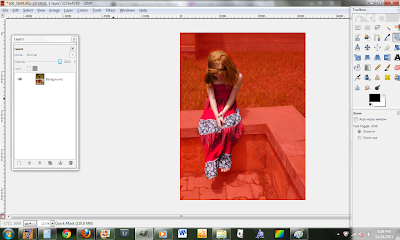
Step 4- Click the erase tool on the toolbar and start erasing the red off of the area that you want to shrink (In my case, I want to erase the red off of Annie).
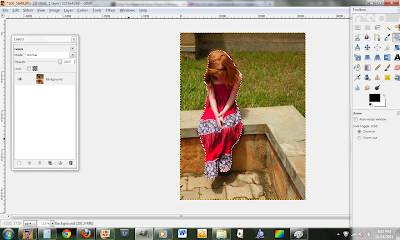
Step 5- Once you've erased all the red off the subject you want to shrink, press Shift I and then a black and white line should come up around your subject. Now you began to erase everything outside of your subject (Note: With the line around your subject, it can't be erased, so you can go all out on erasing :P)
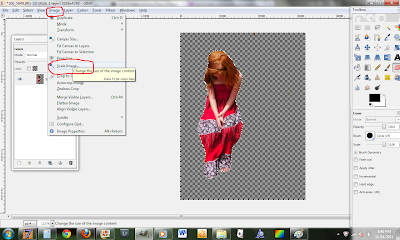
Step 6- When you've finished erasing, your subject should be surrounded by gray checkers. Now it's time to began SHRINKING!! Go to Image>Scale Image and resize your image :)
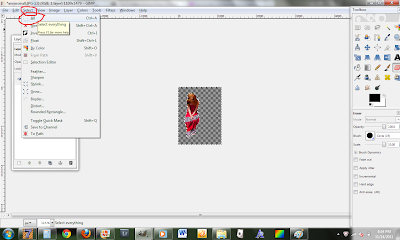
Step 7- When your image is the size you want it to be go to Select>All then go to Edit>Copy
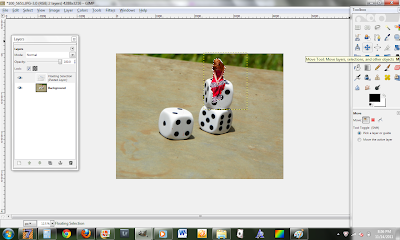
Step 8- Open the picture that you want to add your shrunken subject to (choose Open Image, not Open Image as Layer). Then paste your subject onto it (Edit>Paste) Next, use the toolbar that has 4 arrows pointing in different directions to move your subject around the photo :)
(Once you save your picture the lines will go away, by the way.)
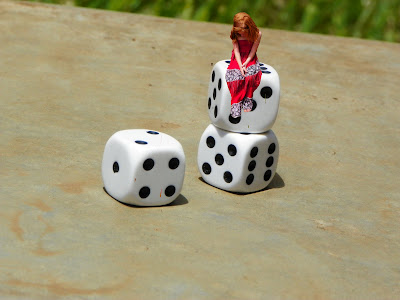
And you're done!! Hope that helps :)
If you have any questions, please leave a comment!
My family is taking a trip to Gulu (Northern Uganda), so I won't be posting for the next few days.


 via & via

 via
via
 via
via

 via
via via
via Pinterest is my key to inspiration!
 Photo credit: Danny Hollenbeck
 Photo credit: Angel ;)
 photo credit: Courtney Wrinkle
 via
via via
via via
via via
via via
via via
via via
via via
via via
via via
via via
via


